How to Repurpose a Dollar Tree Sign
When new seasonal décor is stocked at Dollar Tree, I have so much fun browsing around. After all, who wouldn’t? It’s only $1!! The trouble is sometimes I don’t use the supplies from the holiday and then it sits around taking up space in my craft stash. Let’s face it, I don’t need any help making my craft stash bigger!!
I found a way to take some Valentine’s Day signs and turn them into other usable decor. It was so easy!! You know my favorite projects are fun and quick, so this one is too!
All you need is: of course, a sign
Mod Podge
Paint brush
Scissors
Iron
Parchment paper
Pencil
Calendar or other picture
Sand paper

This is the sign that I never used for Valentine’s Day. Cute, but now it’s out of season.

The first thing you need to do is sand off the glitter and any other raised up part of the graphics.

I poured some Mod Podge into a Styrofoam bowl and with my disposable brush I painted a nice full coat onto the sign. Make sure you don’t miss any spots. Allow it to dry thoroughly.

I bought this calendar a while back that had some really nice monthly pictures that were the right size to cover the sign.

I took it apart by removing the staples from the center with a screwdriver.

I chose an Easter picture from the calendar and carefully cut it close to the correct size.

Using a pencil, trace the sign onto the back of the picture. Trace close to the sign so it’s a better fit. Then cut it out on your pencil line.

Rip off a piece of parchment paper big enough to fit over the sign. Carefully line up your picture on top of the design and put the parchment over it.
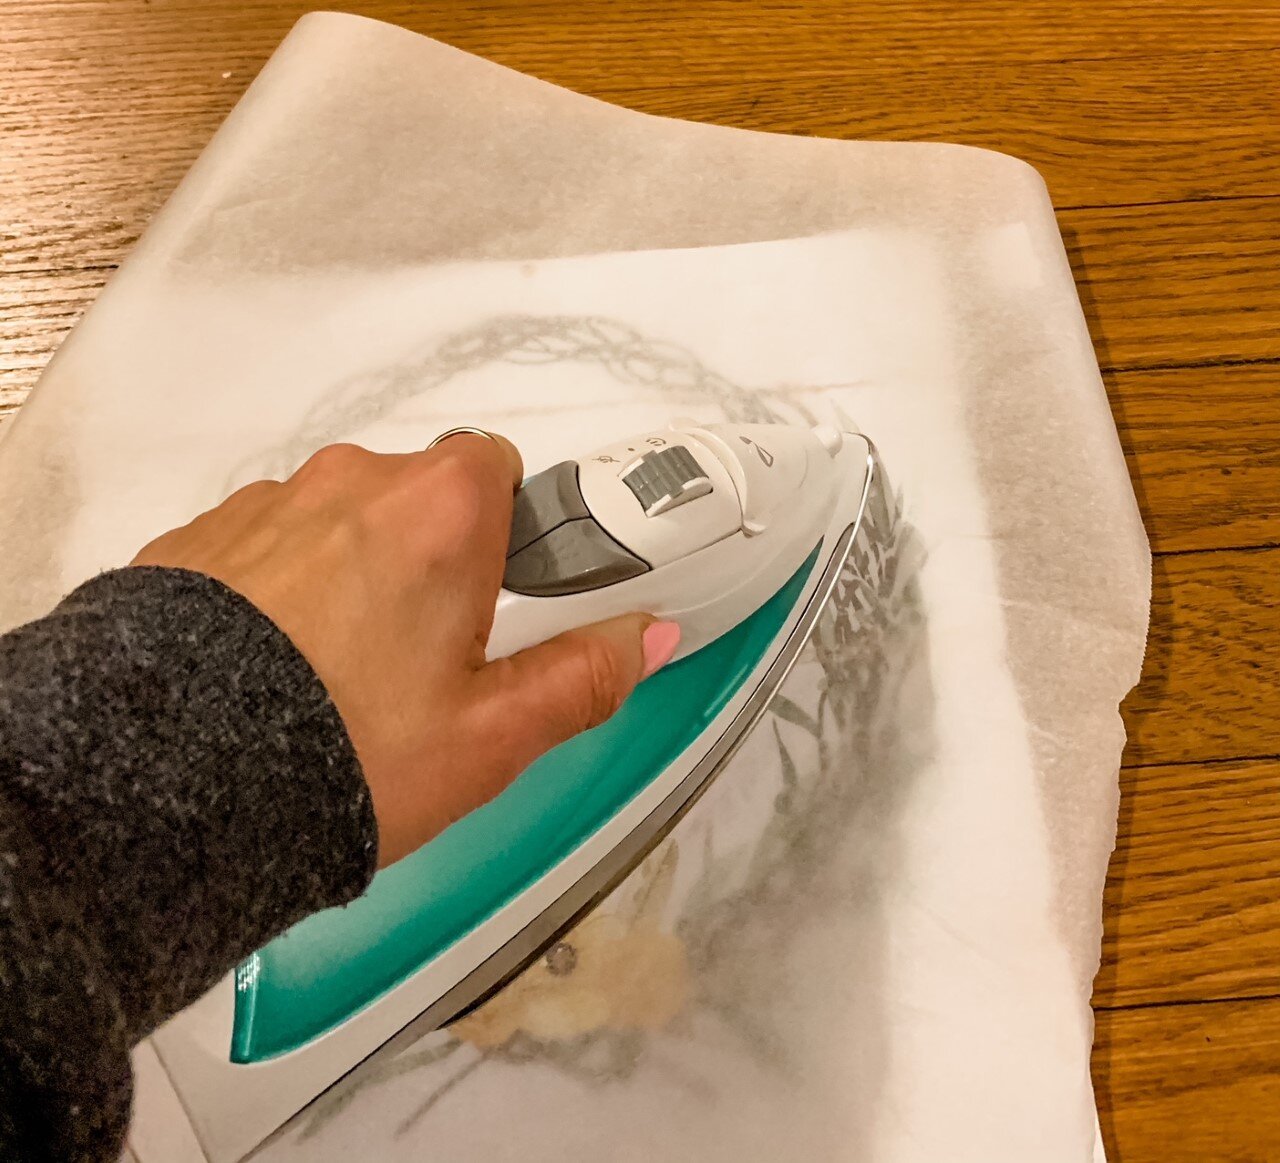
Carefully iron the picture. This will adhere it to the Mod Podge. Check for air bubbles. If you have any, just re-iron it.

Once it’s ironed on well, take your sandpaper again and sand off the edges. Take a few swipes over each edge. This will trim off the paper so it is smooth and even with the edge of the design. If you see a loose edge, just re iron it. Put the twine hanger back in the top.
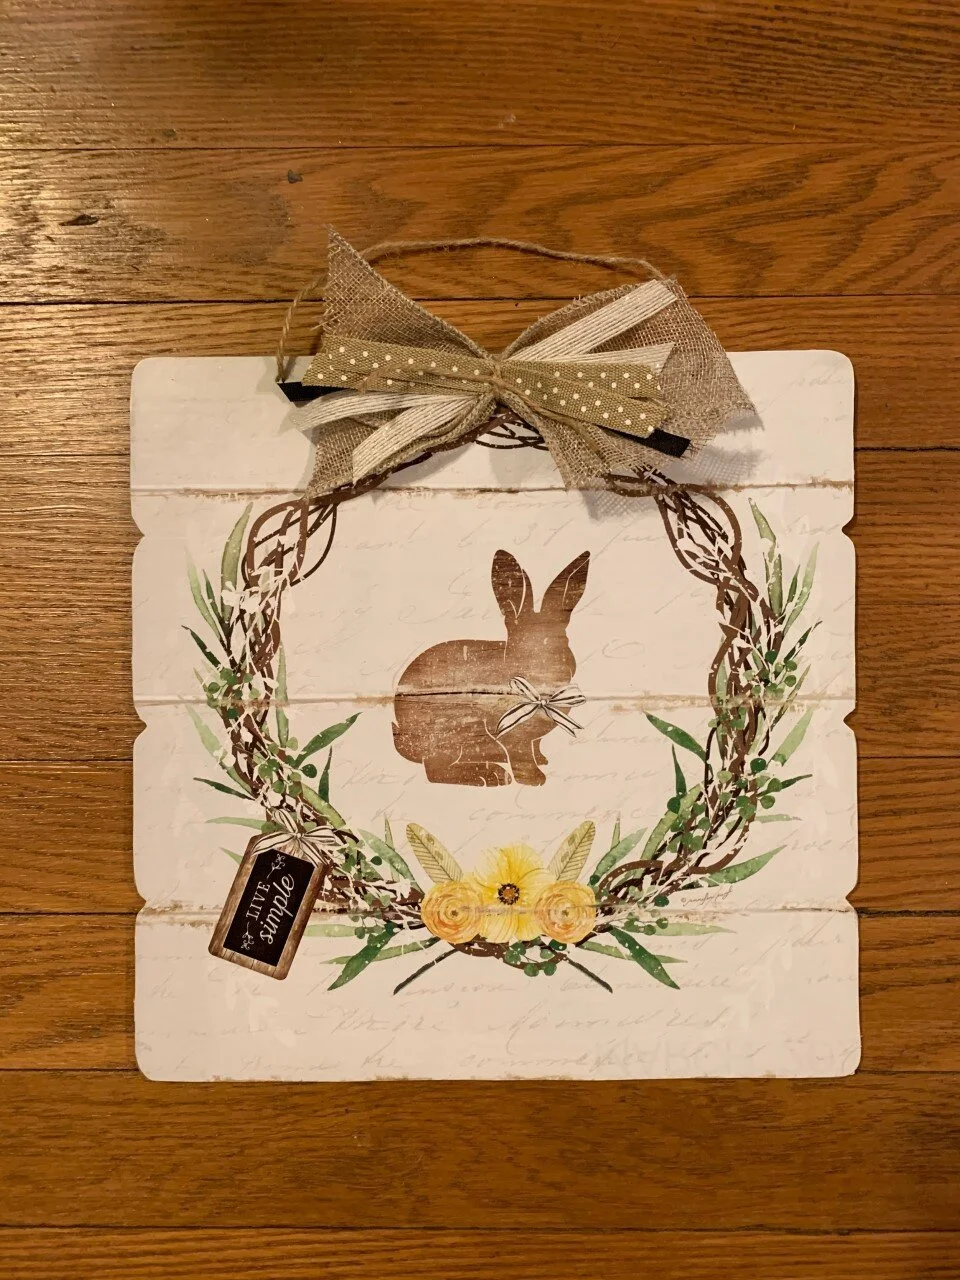
I made a little burlap bow to hide the little hole from the calendar, but I think it adds a little something to finish it off well.

I made 3 signs in one night, that’s how easy it was! The calendar wasn’t quite big enough for the other two so I just covered the empty sides with ribbon and a bow. Three sign using all the same process!! Total cost was $4 plus some small pieces of ribbon. Great spring décor without breaking the budget!!